


How to register customized nozzle data into mounter?
Jan 01, 2022 Editor: admin
Registered nzl. no tableThis command displays the list of the nozzles already registered and their information on the screen.
When you select the <Registered nzl. no table> command from the <file>menu, the " Registered nozzle no. table" dialog box appears on the screen.
Nozzle Information Window
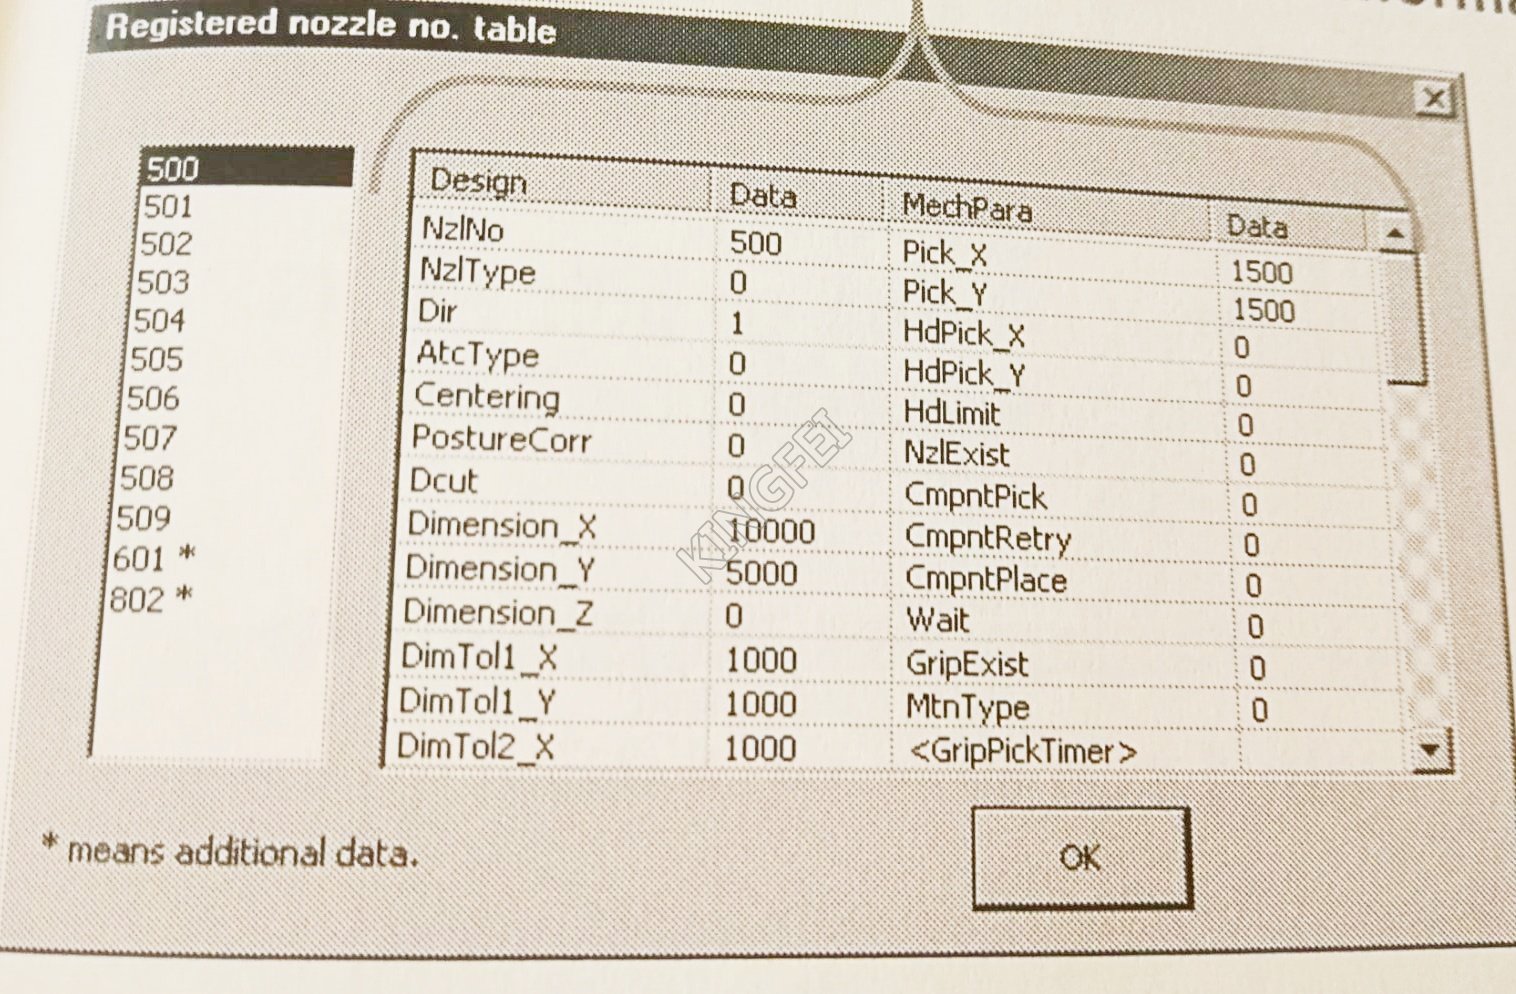
Registered Nozzle No. Table dialog box
Caution: Never Change the settings displayed here. If you happen to change one of them, the system may not place a component on a board normally. If you have to change any setting, contact our technical person.
This list box displayed on the lists the nozzle numbers registered currently. As the initial setting, only the numbers of the standard nozzles (500 to 509) are displayed here.
The list box on the right side displays the data on the nozzle you select from the left list box.
Read Nzl. data ( read nozzle data)
This command adds and registers the information on the customized nozzle to the system. Select this command if you use any customized nozzle.
Normally, information on an additional nozzle is provided by a floppy disk.
The file format of the additional nozzle information is "NZL***.ini", that is an "ini" file, where *** indicates the nozzle number.
When you select the <File>/<Read Nzl. data> commands form the menu bar, the "Nzl.data file open" dialog box appears on the screen.
Select the desired file, and click the < Open> Button. The specified data is registered to the system.
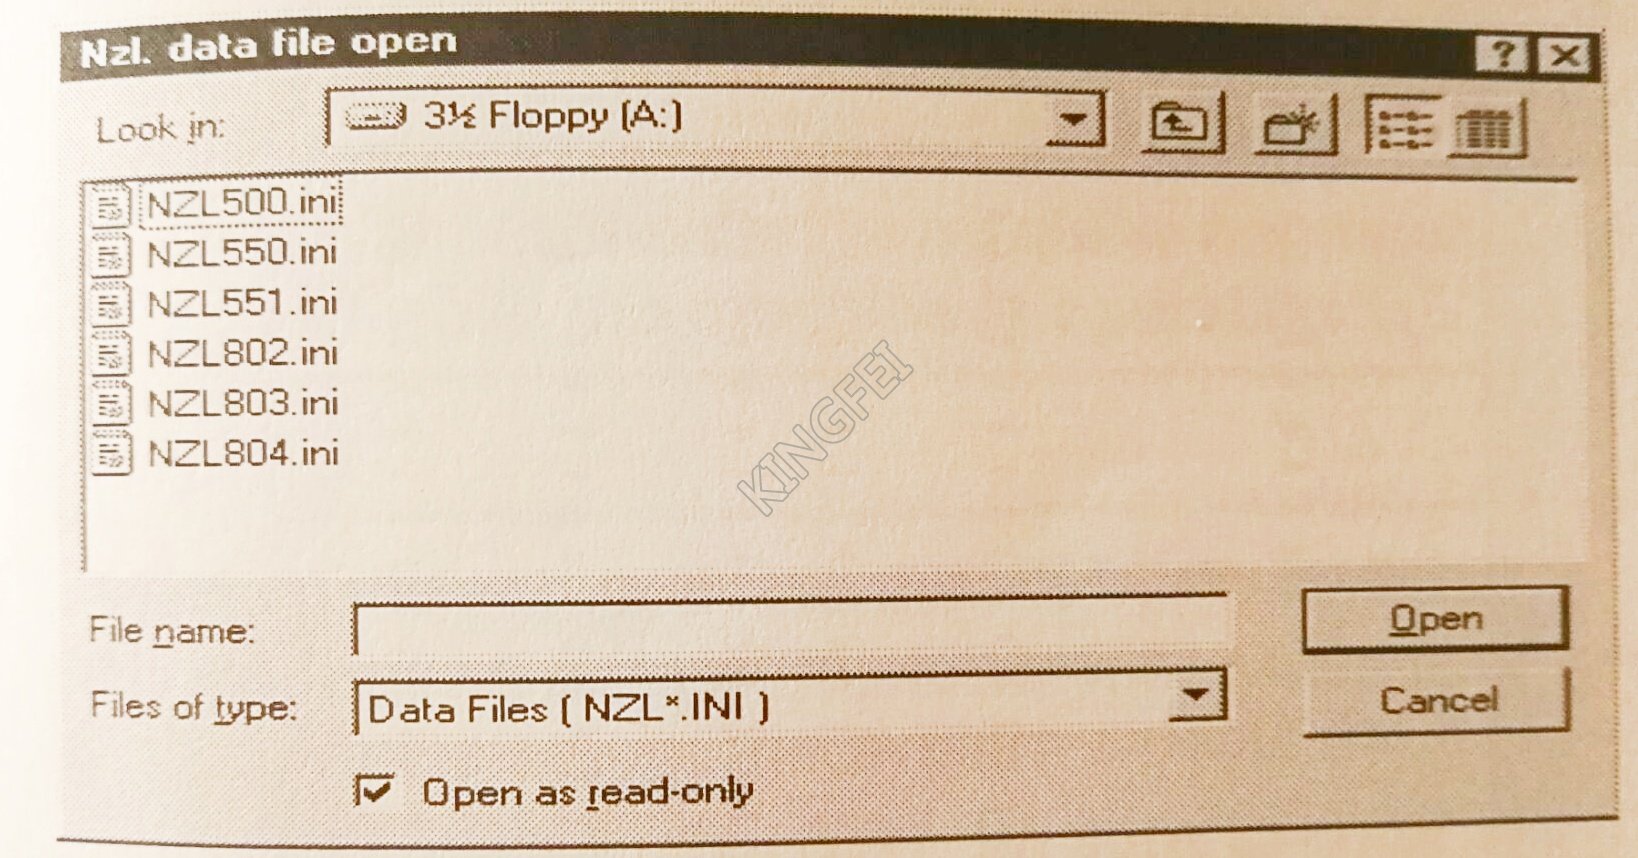
You can check the nozzle number(s) you added on the " Registered nozzle no. table" dialog box.